BlueStacks is one of the
Fix Camera Not Working on BlueStacks
How to Fix Camera on BlueStacks Not Available
Method 1: Reset the Camera app on Windows 10
The first solution to fix the camera problem on BlueStacks is to try resetting the camera app on Windows 10 and check if the error persists.
Follow the steps below:
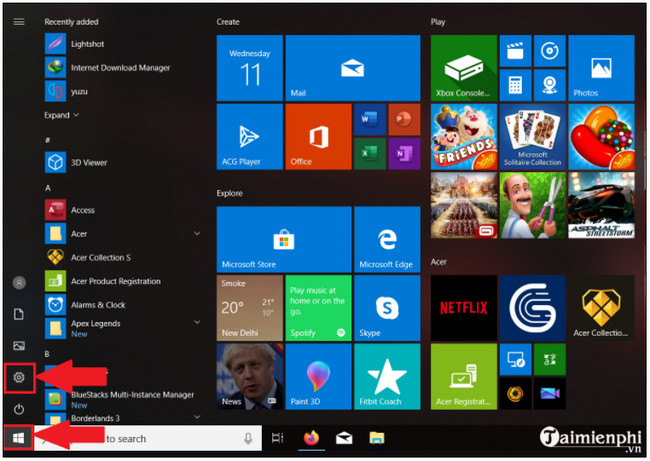
Step 1: First click Start Menu, then find and click on the cog icon to open the Settings window as shown below. Or the fastest way is to press Windows + I.
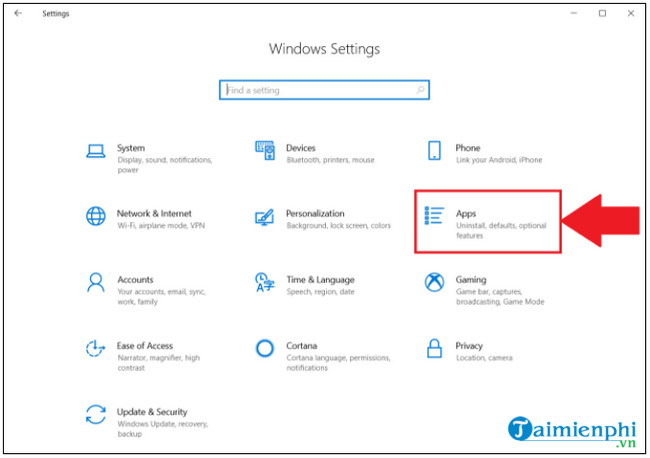
Step 2: On the Settings window, find and click on Apps.
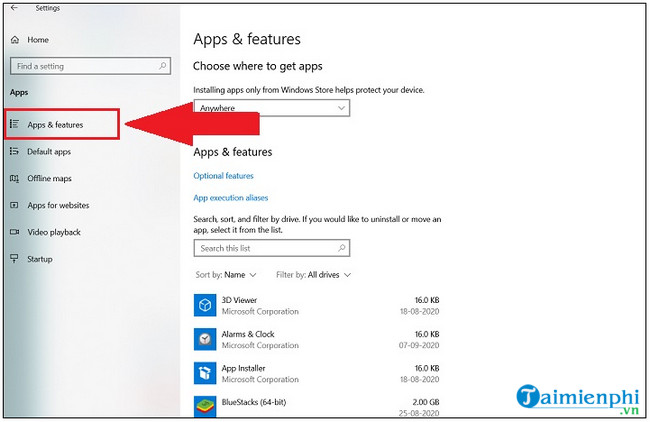
Step 3: On the next window, find and click the Apps & Features tab.
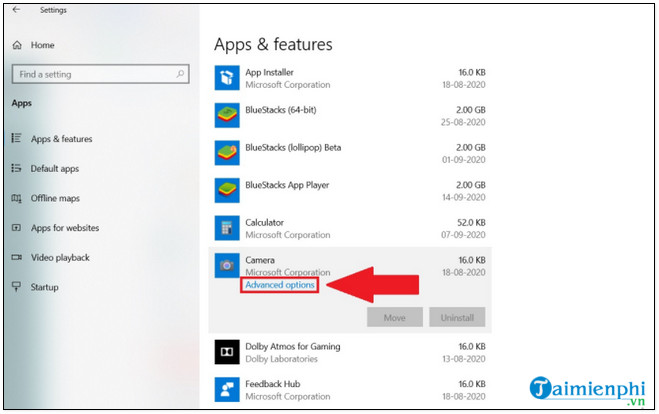
Step 4: Here scroll down to find and click on the Camera app, then click on the Advanced options below.
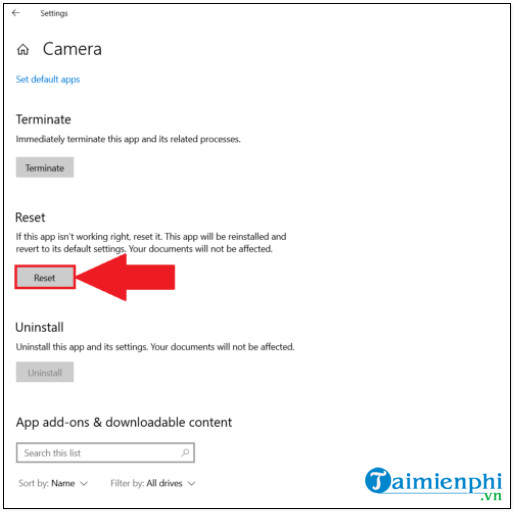
Step 5: Scroll down to find and click the Reset option to reset the camera app again.
Once the process is complete, try to check that the camera on BlueStacks is working properly.
Method 2: Check if the camera integrated with BlueStacks is working
In case if the above is not available, try to check if the camera integrated with BlueStacks is working properly.
To do this:
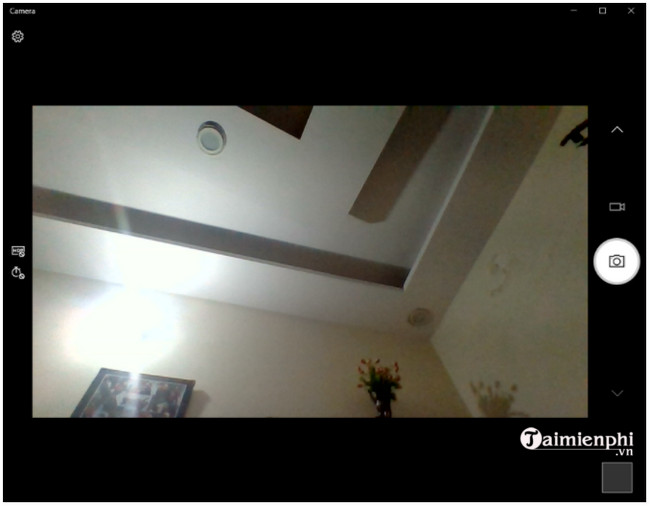
Step 1: First enter “camera” in the Search box on the Start Menu. On the list of search results, click to open the app.

Step 2: If the camera is open and working properly, it can be sure that the cause of the error is not the camera app.
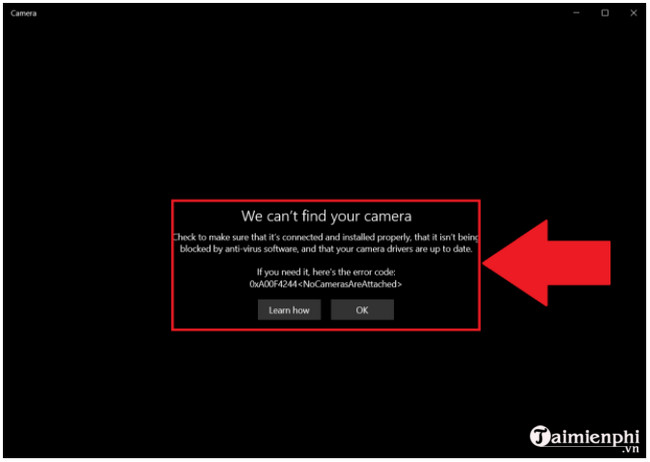
In case if the camera is not working properly, an error message window will be displayed on the screen as shown below:
If you do not know how to open the Camera on your computer, laptop, Windows, you can refer to the instructions here to do it.